Housing an aquarium computer

As mentioned before, I purchased a Lattepanda as a single-board computer for running Windows 10. This works great, although the Intel Atom chip runs a little hot and needs extra cooling.

The main purpose of this is to run my Seneye aquarium monitor, so it needs to fit under my aquarium along with the other items that I’ve built to automate my fish hobby. This means an IP56 custom housing which presents me with a challenge: how to get heat out of a sealed box?

IP56 LattePanda case

In the end I have decided that a completely sealed box is unreasonable, although you could imagine a small water-cooled one with the radiator external to the sealed box. Air holes drilled into each end and push/pull fans drawing the air past the computer board seemed to be an excellent idea as the Intel chip runs very hot. There were some challenges:

Getting a USB cable through a grommet

Did you spot my problem? It is in the bottom right of the photo. I was able to get a small micro-USB through a 10mm grommet by removing the sealed cable end, however I now have a bigger problem in that I need to get a USB-A type plug through to service the Seneye SUD device. For that I am using an external USB female panel mount and connect that to the USB input on the computer.

Switching it on and off

Another issue is that the LattePanda has a curious boot-up sequence. First you ‘switch it on’ by supplying power to the USB lead which goes through a sequence of blinking red and blue LEDs, then into a quiescent state of blue LED only waiting for you to trigger the Windows boot. This is done by pressing the ‘on’ micro button on the side to start the boot. But the real issue is that in a sealed box this will not be possible – I have to find a way to click that micro-button externally.

Any ideas?

Lattepanda

I purchased a LattePanda using Bitcoin.

lattepanda-logo

The Bitcoin part is unremarkable – I don’t speculate on it nor use it as a store of value, just for transactions. Buying via a maker web site was simple (their shopping cart software is Shopify and they use BitPay as a payment cartridge). But what really intrigued me was the Lattepanda itself.

It’s pretty cool.

You may know that most single-board computers (SBCs) run on ARM chips. ARM cornered the market for low-powered devices and most mobile phones use them. So too most SBCs including the well known Raspberry Pi. My collection of Beaglebones, RasPis, Odroids and others is now joined by a SBC powered by an Intel. Harking back to an earlier post, this is mostly brought on by a couple of things: a need to run some trenchant Windows software. I’d also like to play movies through it, if possible.

That second need is brought on by never really getting my Plex project working: I could get the recording part through my HD Homerun TV recorder working, and storage wasn’t a problem – it was just that the particular box I chose to put it on wasn’t strong enough to do the transcoding needed to play back the movies on different devices. Perhaps also the Lattepanda won’t be sufficient as I notice that the Atom chip runs REALLY hot and I’m just fitting it with a fan to take some heat away. Let’s see if that helps, but I may need to invest in an Odroid XU4 or something to really get the power boost my home media systems require.

For now I am gearing up the Windows platform on the Lattepanda and installing all the necessary updates, then putting it in a case and under my aquarium where it will run the Seneye Connect software and possibly a webcam on my fishes.

Reading a Seneye using a Raspberry Pi – conclusion

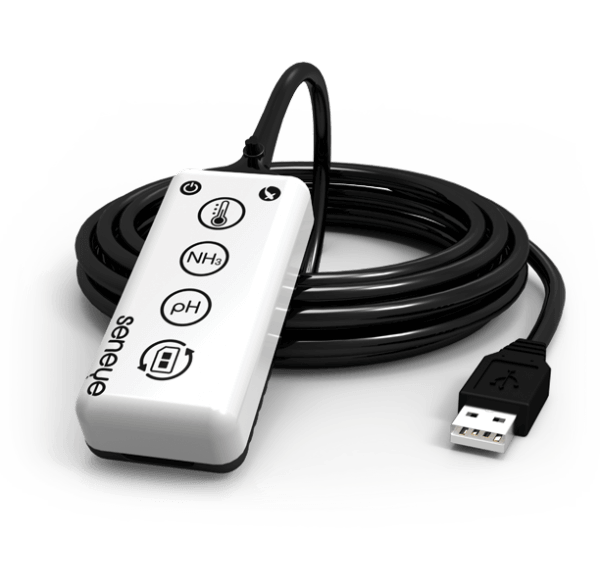
So it can be done, I’ve now able to read a Seneye USB device using my own server and Python code. You can read about the first couple of steps here and here. The process was difficult due to a number of quirks and barriers:

  • the Seneye code uses a C++ STRUCT for data mapping, implying byte-alignment for different data types and bit padding
  • the SUD holds local data readings until it is able to reconnect to the cloud, and will fill up to capacity if it is not connected to the cloud
  • values are decimal-shifted for display
  • if any errors occur the device seems to enter a timeout-locked state (perhaps by missing the BYESUD message?) and has to be unplugged

Firstly the official Seneye C++ code as compiled on my machine and reading the reference mug of water:

IMG_20170703_142232

Then the output from the Seneye code, without their lovely ASCII logo art:

  Device: LSDF0982LSDFOSDLJKS9E89S0D9SDMF v.2.0.16  Type:  Home
  Temperature (C)   │ 20.375                      Is Kelvin           │                   ┌────┘ └────┐
  pH                │ 7.94                        Kelvin              │                   │ ┌─┐   ┌─┐ │
  NH3 (ppm)         │ 0.02                        PAR                 │                   │ └─┘   └─┘ │
  In Water          │ True                        LUX                 │                   │           │
  Slide NOT fitted  │ False                       PUR                 │                   │   ┌───┐   │
  Slide Expired     │ False                                           │                   │   │   │   │
  Press R for reading, 1-5 to change LED, Q to quit

Taking this and observing that the pH value was 7.94, which is 031a in hex, I  scanned through the printed hex dump (and I really must write a small routine to dump binary, hex, and offset in bytes-per-line).  The latest output from my code with debugging turned on can be seen below.

('device       >>>', )
('configuration>>>', )
('interface    >>>', )
('endpoint in  >>>', )
('endpoint out >>>', )
('HELO ret code>>>', 8)
('HELO hex     >>>', (<type 'array.array'>, 64, '88:01:01:01:30:4e:00:00:00:00:00:00:00:00:00:00:00:00:00:00:00:00:00:00:00:00:00:00:00:00:00:00:00:00:00:00:00:00:00:00:00:00:00:00:00:00:00:00:00:00:00:00:00:00:00:00:00:00:00:00:00:00:00:00'))
('READ ret code>>>', 7)
('sensor hex   >>>', (<type 'array.array'>, 64, '00:01:57:59:59:59:05:00:00:00:1a:03:10:00:1a:4f:00:00:00:00:00:00:00:00:00:00:00:00:00:00:00:00:00:00:00:00:00:00:00:00:00:00:00:00:00:00:00:00:00:00:00:00:00:00:00:00:00:00:00:00:00:00:00:00'))
('sensor bits len>', 512)
('sensor bits  >>>', '00000000000000010101011101011001010110010101100100000101000000000000000000000000000110100000001100010000000000000001101001001111000000000000000000000000000000000000000000000000000000000000000000000000000000000000000000000000000000000000000000000000000000000000000000000000000000000000000000000000000000000000000000000000000000000000000000000000000000000000000000000000000000000000000000000000000000000000000000000000000000000000000000000000000000000000000000000000000000000000000000000000000000000000000000000000')
('BYE ret code >>>', 6)
{'InWater': True,
 'NH3': 0,
 'SlideExpired': False,
 'SlideNotFitted': False,
 'Temp': 20,
 'pH': 7}

This means that the pH starts at position 80, runs for two bytes, and is little endian (so x031a is the equivalent of 794 in decimal, and packed into two bytes as it is a short means it looks like ‘1a.03’. The 7.94 comes about because certain of the values returned are divided by 1000, certain ones by 100. It helps to read and understand the Seneye C++ code.

There is obviously some extra commands that are sent by the Seneye Connect software, plus I believe some cryptographic hashes in operation to ensure devices update, only upload from authorised accounts, and other things to keep the Seneye ecosystem together.

Conclusion

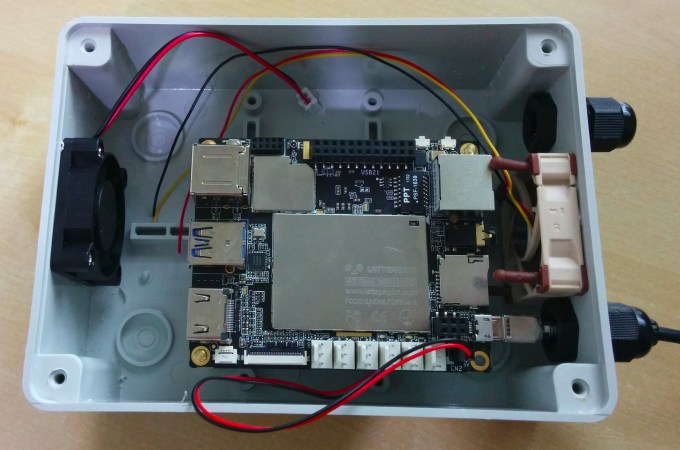
This means that it is unlikely that home DIYers will be able to replicate the full Seneye Connect experience. A LattePanda running Windows 10 and the Seneye Connect software or Seneye SWS probably still give the best experience, along with SMS text alerts and the Seneye dashboard. However, for those who are willing to tinker with code this project provides a reasonable solution.

Reading a Seneye using a Raspberry Pi – coding

In my previous post I discussed how to discover information about the Seneye device, here I will describe some simple code to read values from it and push these to a MQTT broker. I have this running on a small Raspberry Pi Zero W, on which I also have the Motion software and a small streaming web cam.

Having got lots of good information from the Linux commands you start by finding if the device is attached:

    dev = usb.core.find(idVendor=9463, idProduct=8708)

Next, ensure that the operating system does not have control of the device:

    interface = 0
    if dev.is_kernel_driver_active(interface) is True:
        kernel_driver_active = True
        dev.detach_kernel_driver(interface)

Then set the first configuration and claim the interface – and it needs to be done in that order, apparently!

dev.set_configuration()
usb.util.claim_interface(dev, interface)
cfg = dev.get_active_configuration()
intf = cfg[(0,0)]

Alternate settings may be ignored as most devices do not have them, so we move straight to the endpoint and search for the first in/out.

epIn = usb.util.find_descriptor(interface, custom_match= lambda e: usb.util.endpoint_direction(e.bEndpointAddress) == usb.util.ENDPOINT_IN)
epOut = usb.util.find_descriptor(interface, custom_match = lambda e: usb.util.endpoint_direction(e.bEndpointAddress) == usb.util.ENDPOINT_OUT)

Then send the READING message to the device, read the response, and read again with longer timeout so that the measurements can be read and returned.

    msg="READING"
    rc=dev.write(epOut,msg)
    ret=dev.read(epIn,epIn.wMaxPacketSize,1000)
    ret=dev.read(epIn,epIn.wMaxPacketSize,10000)

Once done the fun of picking the bit flags and integers out of the results starts and I have provided just six of them, as they were the ones I could confirm from the Seneye C++ program. At the end you need to send a closing message called “BYESUD”, I guess to tell the device to go into sleep mode or whatever.

    msg="BYESUD"
    rc=dev.write(epOut,msg)

Finished code

All this code is available in my GitHub repository and I’d encourage you to read the code, try it on one of your systems, and if you want to improve it fork the repo and submit pull requests to me. I’m not looking to make it complex with control functions and displays, just something simple and lightweight.

Reading a Seneye using a Raspberry Pi – USB devices

I recently purchased the excellent Seneye aquarium monitor. It is a small device with that sits in a fish tank and monitors various parameters.

home2

I’d been looking for a simple device like this for some time – not too complex, not too expensive. It may not sense some parameters needed in a marine tank however it does do the basics such as temperature, in/out of water, ammonia and pH. As I mentioned before, water chemistry is difficult and you shouldn’t knock those who have tried. Other devices are more complex, expensive, or actually never successfully made it to market. In essence it reads the colour change of a litmus strip by comparing it to a sealed reference, as well as temperature and water refraction.

The challenge came about because although they have a cloud solution that transmits readings every 30 minutes, the device itself has to connect to a Windows PC and thence to the cloud. I’d looked at running a low-powered Windows SBC or even purchasing Seneye’s always-on connection device, but the easiest seemed to be to read the USB device.

USB devices

USB devices are a wonder to behold. They do a lot of work internally and the USB protocol spec runs for many pages. I looked for libraries to help me read the device and found a couple which work in Python, my language of choice. USB also delineates a special form of device known as the ‘HID’, or Human Interface Device. These are things such as USB mice, track-pads and keyboards. They have a simpler interface and only use a couple of the modes of transfer: control, and interrupt.

Walking the USB tree

As USB devices have a hierarchical protocol we need to find out some things about it.

  1. Device
  2. Configuration
  3. Interface
  4. Alternate setting
  5. Endpoint

We start by looking at the device itself using Linux commands and the udevadm command. The udevadm command may not be installed on your system and should be installed using your distro’s package manager.

Firstly, using lsusb we get to see where our device is sitting on the bus – and note that this changes every time we plug it in.

lsusb
Bus 002 Device 089: ID 24f7:2204

… so our device is on the bus number 2, and is at device number 89. Now, using udevadm we can test this and get the device characteristics:

udevadm info -a -p $(udevadm info -q path -n /dev/bus/usb/002/089)
looking at device '/devices/pci0000:00/0000:00:14.0/usb2/2-1':
    KERNEL=="2-1"
    SUBSYSTEM=="usb"
    DRIVER=="usb"
    ATTR{authorized}=="1"
    ATTR{avoid_reset_quirk}=="0"
    ATTR{bConfigurationValue}=="1"
    ATTR{bDeviceClass}=="00"
    ATTR{bDeviceProtocol}=="02"
    ATTR{bDeviceSubClass}=="00"
    ATTR{bMaxPacketSize0}=="64"
    ATTR{bMaxPower}=="250mA"
    ATTR{bNumConfigurations}=="1"
    ATTR{bNumInterfaces}==" 1"
    ATTR{bcdDevice}=="0125"
    ATTR{bmAttributes}=="80"
    ATTR{busnum}=="2"
    ATTR{configuration}==""
    ATTR{devnum}=="89"
    ATTR{devpath}=="1"
    ATTR{idProduct}=="2204"
    ATTR{idVendor}=="24f7"
    ATTR{ltm_capable}=="no"
    ATTR{manufacturer}=="Seneye ltd"
    ATTR{maxchild}=="0"
    ATTR{product}=="Seneye SUD v 2.0.16"
    ATTR{quirks}=="0x0"
    ATTR{removable}=="removable"
    ATTR{serial}=="F500214755881923AEAEA4260100D020"
    ATTR{speed}=="12"
    ATTR{urbnum}=="32"
    ATTR{version}==" 2.00"

From this we can see that the device has one configuration and one interface. It also contains the device’s serial number. Other notable things are the maximum packet size, and the power requirements. That number of interfaces response is a little odd?

Why is everything on Windows?

On the trail for my aquarium monitor I came across the excellent Seneye range of aquarium sensors. They seem to provide all that I need:

  • Acidity (pH) reading
  • Temperature
  • Light
  • Ammonia (NH3)

… and are USB connected and powered. So far so good. They seem to use a replaceable litmus test strip which is read by what appears to be a colour-detecting LDR, so I understand the need to replace them periodically to maintain calibration and readings. What is a little frustrating is that the software only runs on Windows.

Now, I think Windows is a capable OS and useful in a variety of contexts, but one of those isn’t the area of small and embedded devices. These have very limited memory models and typically require ultra-low power levels when sleeping – something I’m certain that Windows doesn’t really understand. To run Windows locally I could actually buy a LattePanda board with Windows 10 IOT, but at around £100 the sticker shock has set in and I am thinking of taking another route.

Off-the Shelf Devices

I think I have two options at this point: Continue with the Seneye and try to get their SUD Driver working on a Linux box, or roll my own:

Seneye and SUD driver

Temperature and light are fairly easy to get with sensors like the DS18B20 and light-detecting diodes (LDRs). So, the extra which the Seneye solution give are the pH reading (which isn’t easy to calibrate nor leave in a solution too long) and the ammonia. I appreciate that these are difficult things for the reasons below.

Roll my own

What I’d ideally like is a single-board computer that is tiny, runs off a battery forever, reads from the sensors outlined above, and can communicate to a local WiFi access point. The rest I can do myself including piping MQTT messages to a remote server, setting up a firewall and whatnot. I think all of this could conceivably almost fit onto a ESP8266 device, but the voltage handling for the pH probe would most likely not go too well, and I don’t know about the inputs for the temperature probe. Measuring the chemicals is way more difficult, until they are solved in a way which means that fouling of the sensor or leaching of the indicator dyes does not occur, I think I will let others do the pathfinding.

So it is likely that something more capable like at least a WiPy or RasPi Zero W would work, or even larger like a full-blown Odroid C2 or RaspPi 3. But why stop there? Why not just go full LattePanda and £100 if you need those, since they really don’t run well on batteries.

Chemistry – measuring soup

What I really need is a neat, innovative way to read water chemistry. My son who is a chemistry student at university tells me that lab equipment to measure individual molecules is terribly expensive, and that mostly they are used in a pure environment where only one type of molecule is present in a solution. What I need is a way to look in a non-invasive way at ‘soup’, and tell how much of one chemical it contains.

Not easy.

This is likely the reason many of these devices either use rare earth metals and fancy rotating face-plates to discourage fouling. They still need replacing every so often because they are in the aquarium water, and the dyes and inks are leaching away. The Seneye does this with a covered, reference litmus strip while another is exposed to the aquarium water and provides the measurements.

Spectroscopy

My son spoke of IR-spectroscopy which is used in organic chemistry, and UV-spectroscopy which is used elsewhere. IR-spectroscopy is likely what devices like the Mindstream are using, comparing reference ranges with that coming back from their IR LDRs and using clever materials and rotation to avoid excessive fouling. It is likely that measuring such a chaotic solution would mean that multiple wave lengths would be returned, however if you just wanted very coarse-grained information like ‘no ammonia/ammonia’ it may be possible.

My guess is that these real-world issues have hampered a single device that tells you what is in your aquarium water for some time, and that until some clever thinking is applied or new material science used, we will have to continue either replacing our litmus strips periodically or buying expensive reference disks.

Aquarium monitor

Not satisfied by not finishing my first project, I boldly go where I have gone before. This time I approach my other hobby of fish keeping with all the unbridled enthusiasm of the wandering electronics geek. I’m going to build a fish tank monitor!

This was all started by building a small tropical fish tank for my in-laws. This will be sited away from where I live, and rather than the hard landscaped gravel aquarium with plastic plants which it started as, I have suggested a more living aquarium with shrimp, snails, few fish and easy plants such as ‘Cuba’ and lilies. In addition a much more capable external Eheim canister filter will scrub the water well, and I am recommending little if no water changes as that works very well for my 120l fish tank.

But all this will happen a long distance away from here and I want to know how things are going remotely – hence the felt need for a monitoring station. While there are ones like the Seneye they do need a replaceable slide every month, and others like the Mindstream or Apex are truly expensive – plus they are built to control dosing or other schedules like lighting. I can do all of that using a cheap timer, and don’t need the expensive gear for what needs to be a simple tank.

Ideally I’d like to hook up a couple of sensors to a single-board computer such as an Odroid or Raspberry Pi, and connect to the local WiFi to transmit readings through to somewhere else – none of that worries me at all and using things like MQTT make it all very simple. Apparently for the Seneye you don’t even need the branded web server as you can use another server to do it – see here. But the sensors are the right pain as I’ll explain below. I’d like to be able to read:

  • temperature probe – these are simple
  • pH probe – much more complex and needs both calibration, and removing from the water due to fouling. I could use something like this to read the probe
  • NH3 as this affects the fish badly
  • light levels – likely simple as well
  • water levels – no water = bad! Conduction strip or
  • … anything else I dream up.

I don’t need a display nor a GUI front-end as I am happiest when treating my SBCs as remote and headless – I find it tunes the mind to not trying everything and understanding how to recover remotely without a keyboard.